

Best Exercises for Pelvic Stability at Home
Pelvic stability affects far more than exercise performance. It helps you roll over in bed, lift a child, climb stairs, return to running, and move through a workday with less strain. The best exercises for pelvic stability build coordinated control between the pelvic floor, deep abdominal muscles, hips, and lower back. They are not simply about doing more Kegels or holding a plank for as long as possible.
For many people, pelvic discomfort, leaking, hip pain, low back pain, or a feeling of weakness develops when the body cannot manage pressure and movement efficiently. A well-chosen exercise program can improve support and confidence, but the right starting point depends on your symptoms, injury history, pregnancy or postpartum status, and current activity level.
What pelvic stability really means
The pelvis is a central connection point between the spine and legs. Stable does not mean rigid or tightly held. Healthy pelvic stability means your muscles can respond at the right time and with the right amount of effort as you breathe, bend, walk, or carry a load.
The pelvic floor forms part of the base of the core. Above it, the diaphragm influences breathing and pressure management. Around it, the deep abdominal muscles, glutes, hip rotators, and back muscles help guide movement. If one area is weak, overactive, painful, or poorly coordinated, another area may work too hard.
This is why repeatedly squeezing the pelvic floor is not the answer for everyone. Some people need strengthening, while others need to learn how to relax an overactive pelvic floor before adding more effort. Pain with intercourse, persistent pelvic pain, constipation with straining, or a constant sense of tension are reasons to seek an individual assessment rather than starting a generic strengthening program.
Best exercises for pelvic stability and control
Start slowly and prioritize quality. You should be able to breathe normally and keep discomfort mild. A little muscle fatigue is expected, but sharp pain, heaviness in the pelvis, increased leaking, numbness, or symptoms that linger into the next day are signs to reduce the exercise or get professional guidance.
1. 360-degree diaphragmatic breathing
This is the foundation for pelvic and core control. Lie on your back with knees bent and feet supported, or sit comfortably if lying down is not practical. Place one hand on the lower ribs and the other on the lower abdomen.
Breathe in through your nose and allow your ribs, abdomen, and lower back to expand gently. As you exhale, let the ribs soften down and imagine a light lift through the pelvic floor, without clenching your buttocks or holding your breath. The effort should feel subtle, around 20 to 30 percent rather than a hard squeeze.
Try five to eight calm breaths. This exercise is particularly useful if you tend to brace your stomach, hold tension through the hips, or notice symptoms during lifting and coughing.
2. Heel slides
Heel slides teach the trunk and pelvis to stay controlled while one leg moves. Begin on your back with knees bent. Find a comfortable neutral position for your lower back rather than pressing it forcefully into the floor.
Exhale gently to engage the lower abdomen and pelvic floor, then slowly slide one heel away along the floor. Only move as far as you can without twisting the pelvis, arching the back, or losing your breath. Bring the foot back, reset, and alternate sides.
Complete six to 10 repetitions per side. If this feels easy and controlled, progress by lifting the foot slightly as you extend the leg. If you feel pressure or pulling in the low back, shorten the range of motion.
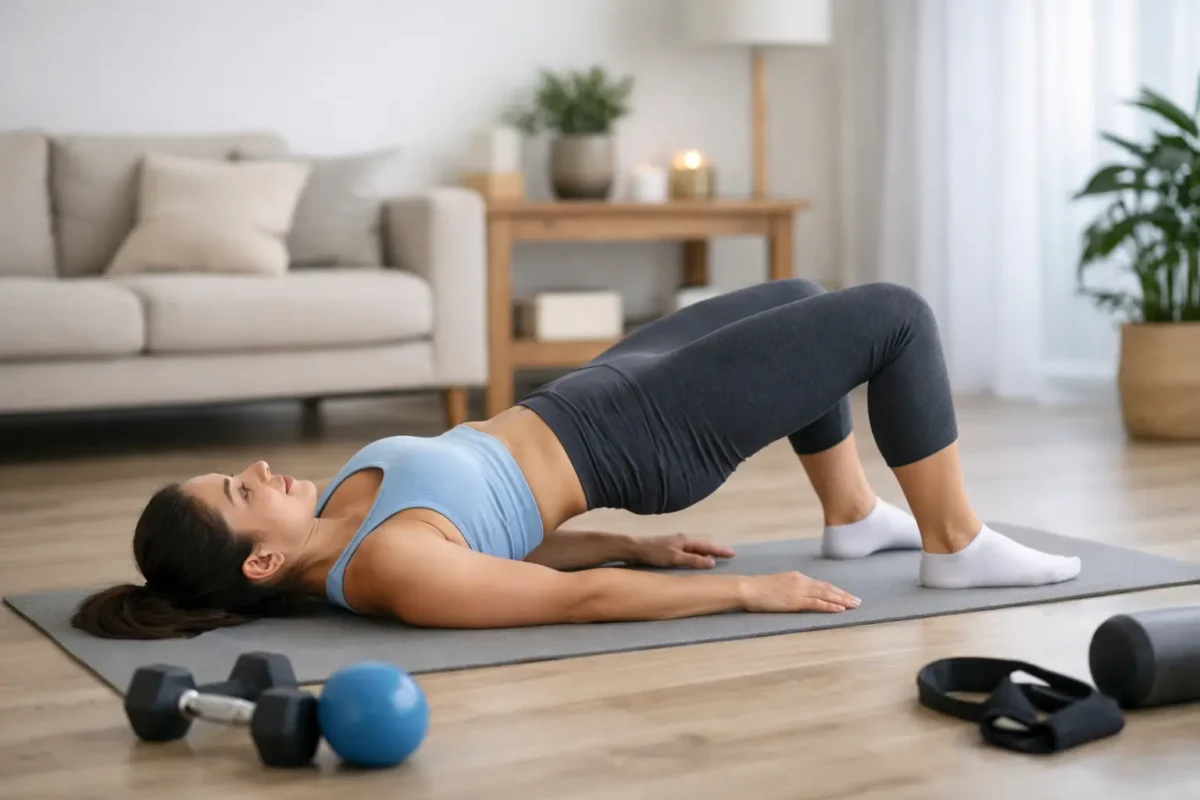
3. Glute bridges
The glutes support the pelvis during walking, stairs, squatting, and lifting. To perform a bridge, lie on your back with knees bent and feet hip-width apart. Exhale and gently engage your lower abdominal muscles. Press through both feet to lift your hips until your trunk and thighs form a comfortable line.
Avoid pushing into a high back arch or gripping through the hamstrings. Think about lengthening through the front of the hips while your ribs remain relaxed. Pause for two or three breaths, then lower with control.
Aim for two sets of eight to 12 repetitions. If cramping occurs in the hamstrings, bring your feet slightly closer to your body or reduce the height of the bridge. A bridge should feel primarily through the buttocks, not the low back.
4. Side-lying hip abduction or clamshells
The outer hip muscles help prevent the pelvis from dropping or rotating excessively when you stand on one leg. This makes them valuable for people with hip discomfort, knee pain, low back pain, or difficulty during stairs and walking.
For a clamshell, lie on your side with knees bent and feet together. Keep your pelvis stacked, then raise the top knee only as far as you can without rolling backward. Lower slowly. You should feel the work at the side or back of the hip, not in the groin.
If you prefer a more challenging option, straighten the top leg and lift it a small distance toward the ceiling. Two sets of 10 to 15 controlled repetitions per side is usually enough. More range is not always better – a small, precise movement is often more effective.
5. Quadruped rock backs
Getting comfortable with hip movement can reduce unnecessary strain through the pelvis and spine. Start on hands and knees with your hands under shoulders and knees under hips. Keep a long, relaxed spine, then slowly shift your hips back toward your heels as you inhale. Exhale as you return to the starting position.
Do not force depth. The aim is to let the hips move while maintaining an easy connection through the abdomen and pelvic floor. This can be a helpful early exercise after a flare-up, during recovery from back pain, or when squats feel difficult.
Perform eight to 12 slow repetitions. If kneeling bothers your knees, place a cushion underneath or choose another exercise.
6. Bird dog progressions
Bird dog exercises add a balance challenge while training the trunk to resist rotation. From hands and knees, begin by sliding one foot back along the floor while keeping both hip points facing downward. Return to centre and switch sides.
When that feels steady, lift the opposite arm forward as you extend the leg behind you. Keep the movement low and long rather than lifting the leg high. Your goal is not to eliminate all motion but to avoid collapsing, twisting, or breath-holding.
Try six to eight repetitions per side. This exercise can be progressed gradually, making it useful for active adults returning to gym training, recreational sports, or physically demanding work.
7. Supported sit-to-stands
Pelvic stability needs to transfer into daily movement. Sit-to-stands strengthen the hips and legs while practising pressure management for getting up from a chair. Sit near the front of a sturdy chair with feet beneath your knees. Inhale to prepare, then exhale gently as you stand.
Keep your knees tracking in line with your feet and avoid rushing. Sit back down with control. If needed, use your hands lightly on the chair or a counter for support. Complete two sets of six to 10 repetitions.
This exercise is often more practical than adding another floor exercise, especially for older adults or anyone rebuilding confidence after injury.
How often should you train pelvic stability?
For most people, two or three sessions per week is a reasonable place to begin. Short daily breathing practice can also be useful, particularly when learning to reduce tension or coordinate the pelvic floor with exhalation. Progress comes from consistent, well-controlled practice rather than pushing through symptoms.
As control improves, the next step is to apply it to the activities that matter to you: carrying groceries, returning to a fitness class, walking longer distances, lifting at work, or playing with children. The exercise choice should match the task. Someone returning to running may need more single-leg strength and impact preparation, while someone with postpartum symptoms may benefit from a slower progression focused on breathing, pressure management, and gradual loading.
When to see a pelvic health physiotherapist
An assessment is especially helpful if you have urinary or bowel leakage, pelvic heaviness or pressure, pelvic pain, pain during intercourse, persistent hip or low back pain, or symptoms that began during pregnancy or after delivery. It is also appropriate if exercise makes you feel worse despite careful modifications.
At Churchill Physiotherapy Clinic, pelvic floor physiotherapy can identify whether your muscles need strengthening, relaxation, coordination training, or a broader rehabilitation plan involving the hips, spine, and daily movement patterns. One-on-one guidance helps ensure that your exercise routine supports recovery instead of adding strain.
A stable pelvis is built through calm breathing, controlled strength, and movements that fit your body and goals. Start with the exercise you can perform comfortably today, then allow good technique and steady repetition to carry you forward.